Step 2 of the series: Bypass internet restrictions and protect your privacy on public Wi-Fi
In this part of the series, you’ll learn how to install Ubuntu Server step by step.
Preparing the Ubuntu Server installation
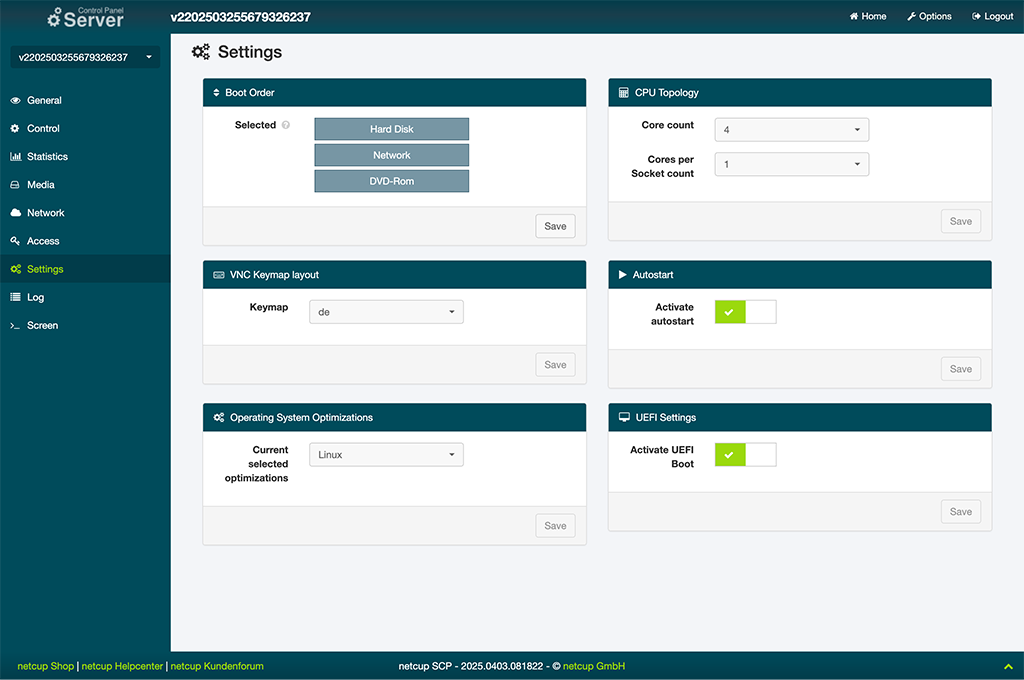
With the login credentials you received, log into the netcup Server Control Panel.
Select your server, then click on Settings on the left. Here you can set the keyboard layout and adjust the UEFI settings. I selected “en” for the keyboard and enabled UEFI boot. You can leave the other settings as they are.
Next, go to Media > Official DVDs and select Ubuntu 24.04 Live Server or a newer version.
Then mount the DVD as shown.

Once the DVD is mounted, you need to restart the server.
First, open the server screen using the VNC Console. On the left, select >_ Screen. A new window will appear showing the login screen of the OS currently installed on the server. In my case, it’s Debian GNU/Linux 12.
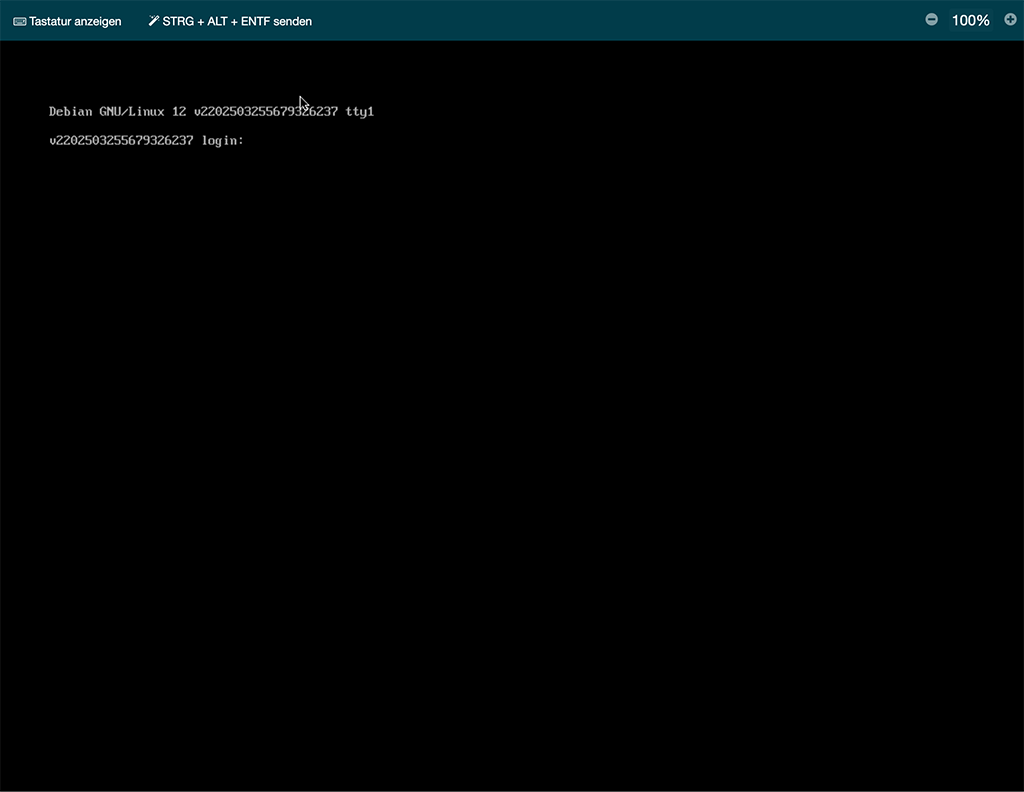
Move the window aside and in the Server Control Panel go to Control > Powercycle. The server will now reboot, and shortly after, the Ubuntu DVD start screen should appear in the VNC Console.
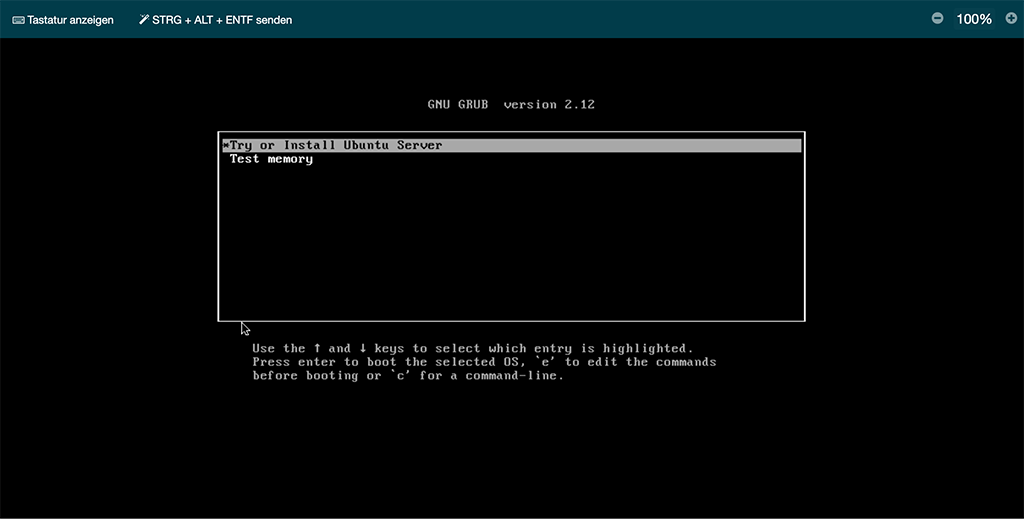
Select Try or Install Ubuntu Server.
Performing the Ubuntu Server installation – step by step
The headings and options remain in the selected default language, English.
- Willkommen! Bienvenue! Welcome
- Keep the language as English.
- Installer update available
- Do not download the latest installer. Select Continue without updating.
- Keyboard configuration
- Choose Identify Keyboard and follow the instructions to detect your keyboard layout.
- Choose the type of installation.
- Keep the default selection Ubuntu Server.
- Network configuration
- Use the default settings; the IP address will be assigned via DHCP.
- Proxy configuration
- Leave this field empty.
- Ubuntu archive mirror configuration
- Accept the suggested mirror.
- Guided storage configuration
- Use the suggested settings: Use entire disk and Set up this disk as an LVM group.
- Storage configuration
- Keep the default settings and confirm that all data on the disk will be erased (Confirm destructive action).
- Profile configuration
- Enter your name, the hostname (shown at the top of the Server Control Panel), your desired username, and a secure password.
- Upgrade to Ubuntu Pro
- Skip the upgrade to Ubuntu Pro for now.
- SSH configuration
- Select Install OpenSSH server.
- Featured server snaps
- Skip this section and do not install any additional software.
- Installing system
- The installation will now proceed.
- After installation, you’ll see [Reboot Now] at the bottom of the screen. Choose this option.
- You will be prompted to remove the installation medium.
- In the Server Control Panel, go to Media > DVD-Drive and under currently attached, select detach DVD to eject the installation DVD. The system will then boot from the hard drive.
- Press ENTER in the remote screen, and the server will reboot. The Ubuntu 24.04 LTS login screen will appear.
Login and software update
Log in using the credentials you provided during installation.
First, update the package list:
sudo apt updateThen update all packages:
sudo apt ugprade -yYour Linux installation is now up to date.
Installing the Qemu guest agent
To improve server control through the Server Control Panel, you need a helper daemon to support communication between the server and the management software.
Install the Qemu guest agent with the following command:
sudo apt install qemu-guest-agent -yIt’s recommended to reboot the server from the Server Control Panel to complete the setup.
In the SCP, go to Control > Powercycle. After reboot, the message stating that the qemu-guest-agent is not installed should disappear.
Leave a Reply
You must be logged in to post a comment.